
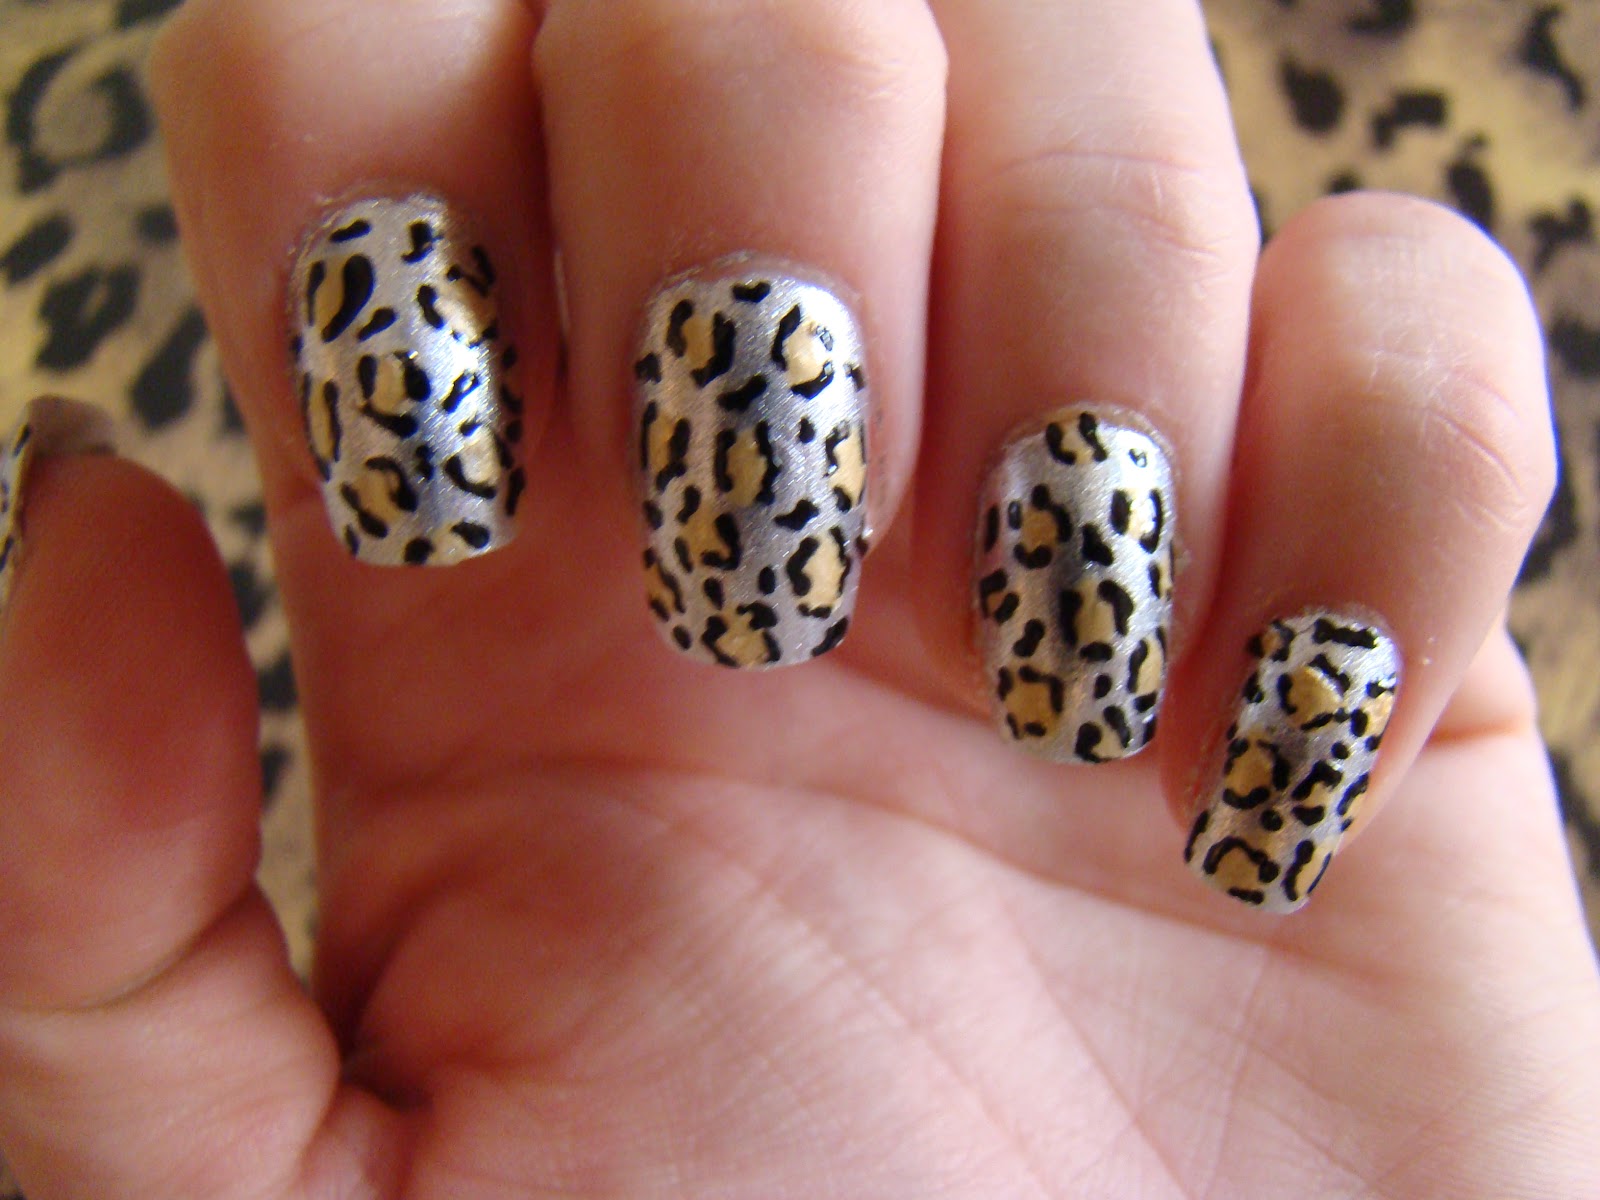
These nail looks turned out so cute! And it's actually really easy to do...Seriously! Here are the products that I used and step by step directions on how I did it...
1. Sally Hansen Xtreme Wear in 220 Celeb City (Target retail $2.49)

2. Pure Ice in Jaguar (Walmart retail $1.78)
 This is a great brand for a cheap nail polish. The quality isn't as great as Sally Hansen, but they do make a ton of fun colors.
 3. Sally Hansen Advanced Hard as Nails in Clear (Target retail $2.99)

4. Migi Nail Art Pen in Black (miginailart.com retail $24.99-8 pack)

Supplies

Step by Step Directions

1. Start with clean unpolished nails. I glued on fake unpolished nails.

2. Paint silver on all nails. May need 2-3 coats. Then make sure they are dried before moving onto the next step.

3.
Paint little gold blobs on your ring finger or on all of your nails
depending on which look your are going for. Paint them like polka dots,
but it looks more realistic if they aren't perfect circles. Then wait
for them to dry before moving onto the next step.

4. Use your black migi nail art pen or
black nail polish and a toothpick to paint little "C" shapes around the
blobs. This also looks better when it is not done perfectly. For some
of the blobs I use 2 "C's" and some I use 3 "Cs". Repeat this step to
all of the gold blobs.

5.
After all of the blobs are finished, I add a few squiggly lines that
look like commas and some dots. Do this to all of your nails or just the
ring finger depending on the look that you chose. Then wait for them to
dry before moving onto the next step.

 7. If there is any nail polish on your skin, just clean it up with a
little bit of nail polish remover and Qtip or orangewood stick.
7. If there is any nail polish on your skin, just clean it up with a
little bit of nail polish remover and Qtip or orangewood stick.
Now
you have really cute nails! Why not paint your toes to match? I hope
you have tons of fun experimenting with different nail looks!
********************************************************************************************************
For The Love Of Nail Polish

pick any color to match your mood or style. I have tried a ton of different brands. Today I am showing you 3 colors.
1. Orly Nail Lacquer in Gum Drop ( Sally Beauty Supply retail $6.99)

I love this color! I'm not normally a blue or green nail polish fan, but something about this color is just so cute. This is the first time that I have tried the Orly brand. It is absolutely my new favorite brand. It goes on great and lasts forever without chipping.
2. Nicole by OPI in My Favorite Gold (TJ Maxx retial $6.00-2 pack)

This is a more of a yellow gold than a copper gold. I have now used the Nicole by OPI nail polish a few different times in different colors. I'm not a huge fan of this brand. I think it's a bit over priced for the quality.
*Painted on ring finger
3. Nailtini Nail Polish in Millionaire (I got this in my IPSY Glam bag retail $13.00)
 This
is a gold glitter polish with blue specks. This is a great quality
glitter polish. I like the way that it goes on very evenly. And it
really sparkles in the light!
This
is a gold glitter polish with blue specks. This is a great quality
glitter polish. I like the way that it goes on very evenly. And it
really sparkles in the light!*Painted on ring finger over the gold polish
No comments:
Post a Comment